
How to Photograph Your Yard for AI Landscape Visualization
Learn how to take a clear yard photo for AI landscape visualization, with framing tips for front yards, backyards, side yards, patios, and privacy checks.
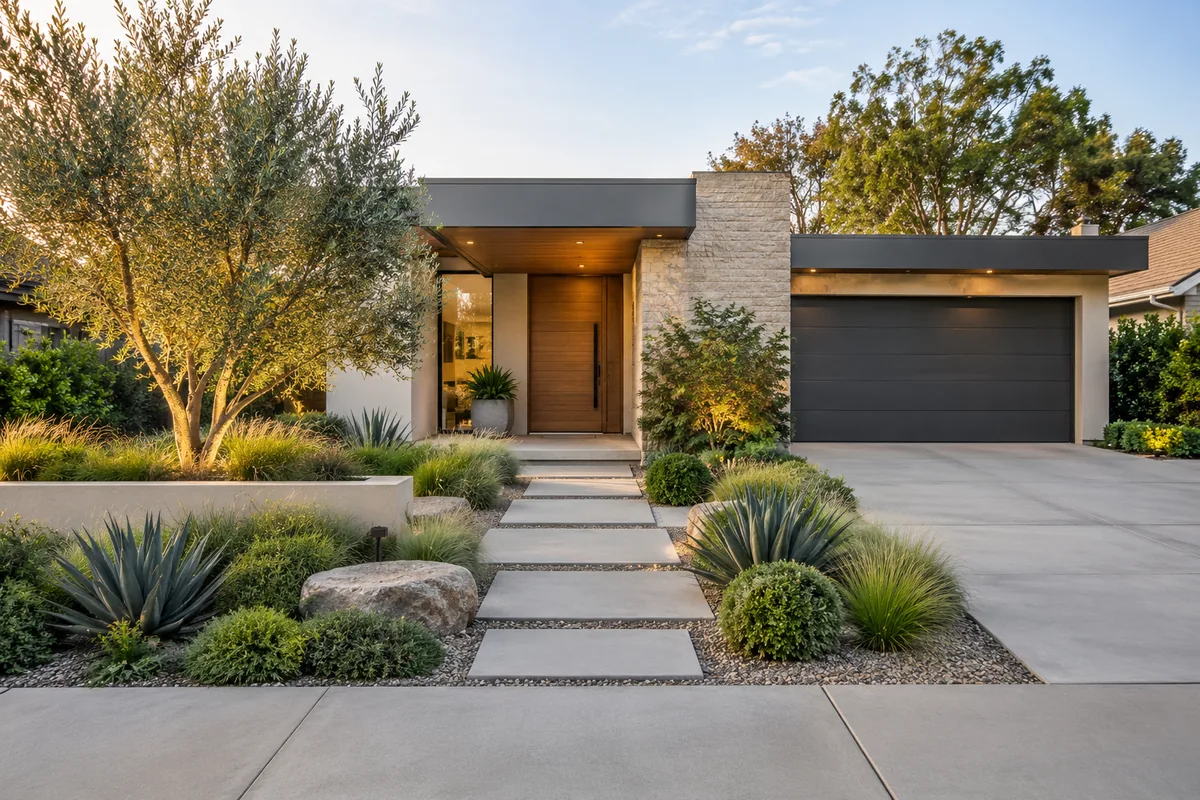
A useful AI landscape visualization starts with a photo that clearly shows the space you want to explore. The goal is not to make the yard look perfect before you begin. It is to give the image model enough honest visual context to understand the house, ground plane, boundaries, circulation, existing plants, and fixed features.
A better photo can improve the coherence of a generated concept, but it cannot turn an AI image into a measured plan. Dimensions, drainage, utilities, plant suitability, structures, codes, and construction decisions still require separate verification.
This guide focuses on the photograph itself: where to stand, what to include, what to avoid, and how the best viewpoint changes for a front yard, backyard, side yard, or patio.
Quick yard photo checklist
Before uploading, check these ten points:
-
The main area you want to redesign is fully visible.
-
The camera is approximately level rather than pointed sharply up or down.
-
The house, fence, patio edge, mature trees, or other fixed references are visible where relevant.
-
Important entrances, paths, gates, and access routes are not hidden.
-
The image is bright enough to distinguish the ground, plants, and structures.
-
Strong glare, deep shadow, motion blur, and rain on the lens do not obscure the scene.
-
People, documents, house numbers, license plates, and sensitive details are removed or hidden.
-
The image is a JPG, PNG, or WebP file no larger than 8 MB.
-
You have the right and permission to upload the image.
-
You understand that the output will be a visual concept, not a site-verified plan.
AILandscape currently accepts one image at a time in its generator workflow. If the project has several important viewpoints, photograph all of them for your own reference, then choose the single view that best communicates the decision you want to explore first.
Start by defining the decision
Do not begin with “How do I photograph the entire property?” Begin with “What decision should this image help me discuss?”
Examples:
-
How could the front entrance feel more welcoming?
-
What broad backyard layout might support dining and relaxation?
-
Could a narrow side yard feel more intentional?
-
What planting and furniture character could suit this patio?
-
Should the space feel open, layered, formal, naturalistic, or low-water?
The best photo is the one that shows the area affected by that decision while preserving enough surrounding context to understand it.
A single distant image of the entire property may make the target area too small. A tight crop may hide the house, access route, or boundary that gives the space meaning. Aim for a view that includes the design area plus its most important relationships.
Choose a clear primary viewpoint
Stand far enough back
Step back until the target area fits comfortably in the frame. Include some space around it rather than cutting off every edge.
If you are photographing a planting bed beside the house, include enough facade to show doors, windows, downspouts, and the bed’s relationship to the building. If you are photographing a patio, include its edges and the route connecting it to the house or garden.
When there is not enough room to step back, avoid immediately switching to the widest possible lens. An ultra-wide view can exaggerate foreground objects, stretch edges, and make a narrow area appear much larger than it is. Try moving to a corner, doorway, gate, or slightly elevated ordinary viewpoint first.
Keep the camera level
Hold the phone or camera so vertical elements such as walls, posts, doors, and tree trunks look reasonably upright. A steep downward angle can make the ground plane difficult to interpret. A steep upward angle may show too much sky and too little landscape.
A chest-height or eye-level view is often a useful starting point. There is no required camera height: the right position is the one that shows the space clearly without creating avoidable distortion.
Use the normal lens when possible
On many phones, the standard 1x camera gives a more natural perspective than an ultra-wide mode. A wider lens can help in a very small space, but check whether nearby furniture, paving, or planting looks unnaturally stretched.
Avoid digital zoom when you can move closer safely. Digital zoom can remove useful context without improving the underlying image detail.
Use landscape orientation for wide spaces
A horizontal image often suits yards because it can show the relationship between the house, ground, paths, and boundaries. A vertical photo can still work for a narrow side yard or a tall planting composition, but make sure the target ground area remains large enough to read.
AILandscape does not promise one ideal aspect ratio. Clarity and useful context matter more than matching a specific frame shape.
Photograph in readable light
Even light makes it easier to distinguish surfaces and fixed features.
Good conditions often include:
-
Bright overcast weather.
-
Open shade with enough ambient light.
-
Morning or afternoon light that does not produce extreme contrast.
-
A dry camera lens and a steady hand.
Conditions to avoid when possible include:
-
A dark yard with a bright sky behind it.
-
Midday glare that turns paving or walls into white patches.
-
Heavy shadow hiding the ground, steps, or planting edges.
-
Night scenes where outdoor lighting overwhelms the landscape.
-
Motion blur from walking or shooting in low light.
-
Rain, condensation, fingerprints, or dirt on the lens.
Do not wait for a professionally staged day. The purpose is documentation for visual exploration. A clear ordinary photo is usually more useful than a dramatic image that hides half the site in shadow.
Include the fixed features that matter
AI generation may still alter or omit a visible object, but hiding fixed constraints makes the input less informative from the start.
Try to show:
-
The relevant part of the house or building.
-
Doors, gates, steps, and primary circulation routes.
-
Driveways, sidewalks, paths, and patio edges.
-
Fences, walls, railings, and neighboring context where appropriate.
-
Mature trees and large shrubs that are likely to remain.
-
Utility meters, equipment, downspouts, and service access when they affect the area.
-
Visible grade changes, drains, channels, or low points.
-
Structures such as sheds, pergolas, decks, and pools.
The presence of these elements in a photo does not mean the AI will preserve them accurately. It gives you a stronger basis for checking the generated result and identifying what changed unexpectedly.
Decide what to remove before taking the photo
Temporary clutter can distract from the design area, but removing too much context can be misleading.
Reasonable items to move include:
-
Loose toys and sports equipment.
-
Trash bins that do not have a fixed storage location in the project.
-
Garden tools, hoses, and temporary bags.
-
Movable vehicles if they block the yard or driveway edge.
-
Personal documents, signs, or address information.
Items to keep visible when they affect the real design include:
-
Air-conditioning equipment and utility boxes.
-
Downspouts, drains, and service panels.
-
Permanent play equipment or storage that will remain.
-
Large existing trees and protected vegetation.
-
Doors, gates, stairs, ramps, and access routes.
-
Fixed furniture, grills, or equipment that the design must accommodate.
If an object will remain in real life, do not hide it merely to obtain a cleaner generated picture. Add it to the “keep” instructions and check whether the output respects it.
Front yard photo guide
For AI front yard design, choose a viewpoint that explains the arrival sequence.
Try to include:
-
The visible house facade.
-
The front door or route to the entrance.
-
The driveway and its connection to the street.
-
Existing walkways, steps, walls, and major planting beds.
-
Large trees and sightline obstructions.
-
The sidewalk, curb, or street edge when relevant.
A view from near the street can show curb appeal and the relationship between the building and yard. A second photo from the driveway or walkway may be useful for your own notes, but the generator still processes one selected image at a time.
Do not use the resulting image to infer property boundaries, setbacks, easements, public rights-of-way, driveway sight-distance requirements, utility locations, or accessible routes. Those conditions need site-specific verification.
Backyard photo guide
For AI backyard design, show how the house connects to the usable outdoor area.
Try to include:
-
The back door, deck, or patio that begins the circulation route.
-
The main open area and visible property edges.
-
Existing paths and transitions between surfaces.
-
Mature trees and large planting masses.
-
Sheds, pools, play structures, retaining walls, and fixed equipment.
-
Visible slope or drainage clues.
If the backyard is deep, a view from the house looking outward often communicates everyday use. A reverse view toward the house can reveal doors, windows, roof drainage, and existing outdoor-living relationships. Choose the image that best answers the current design question.
A backyard concept can help compare dining, privacy, lawn, planting, or relaxation directions. It cannot verify grading, drainage, utilities, retaining structures, permits, plant quantities, or local costs.
Side yard photo guide
For AI side yard design, the challenge is showing a narrow space without making it appear wider than it is.
Stand at one end and photograph along the main route. Include:
-
The gate or entry point.
-
Both side boundaries where possible.
-
The walking surface and visible width changes.
-
Doors, windows, meters, condensers, and service panels.
-
Downspouts, drains, channels, and low points.
-
Steps, grade changes, and roof overhangs.
-
Trees or roots that constrain the route.
Avoid placing the camera extremely close to one wall with an ultra-wide lens unless no other viewpoint is possible. That combination can exaggerate the corridor and distort the foreground.
The image cannot confirm required clear width, emergency access, egress, gate swing, utility clearance, roof-water management, fire rules, or a feasible drainage solution.
Patio and terrace photo guide
For AI patio and terrace design, include the connections and edges that affect circulation and safety.
Try to show:
-
Doors and steps connecting the space to the building.
-
The complete usable floor area where possible.
-
Railings, guards, walls, and open edges.
-
Fixed roofs, pergolas, posts, and overhangs.
-
Existing furniture that provides a rough visual scale.
-
Grills, outdoor kitchens, planters, and storage that will remain.
-
Routes that must stay clear.
A diagonal viewpoint from one corner often shows more relationships than a straight view of one wall. For a small patio, take care that the nearest chair or planter does not dominate the foreground.
A visualization can compare furniture, planting, shade, and atmosphere. It cannot establish load capacity, waterproofing, wind safety, railing compliance, attachment methods, stair safety, or whether a proposed outdoor kitchen or structure can be built.
Common photo problems and how to correct them
Problem in the inputWhy it is difficultBetter approachTarget area is tiny in the frameThe model receives more sky, street, or building than landscapeMove closer while keeping key contextTight crop removes the house or boundariesThe area loses its relationship to fixed featuresStep back or use a corner viewpointUltra-wide foreground is stretchedPaving, furniture, and planting proportions look misleadingTry the standard lens or move farther backGround is hidden in shadowSurface edges and planting areas are hard to distinguishReturn in more even daylightCamera points sharply downwardThe space appears compressed and walls may disappearLower and level the cameraFurniture or a vehicle blocks the siteThe generator has less visible landscape contextMove temporary obstructions when practicalPanorama contains stitching errorsLines and repeated objects may be inconsistentUse one normal still imagePortrait mode blurs the backgroundImportant site context is intentionally removedUse the standard photo modeScreenshot includes interface controlsNon-property elements become part of the inputUpload the original exported image insteadSensitive details remain visibleThe upload may reveal personal informationCrop, cover, or remove them before upload
How to write useful “keep” instructions
A clear photo and a clear instruction should support each other.
Instead of writing:
Keep everything important.
Name the visible constraints:
Keep the mature tree, front steps, driveway, mailbox, and clear path to the door.
Or:
Keep the patio footprint, sliding door, fence, and equipment access along the right side.
Short, concrete instructions are easier to evaluate. After generation, compare each named element with the source photo. If a critical feature disappears, changes shape, or moves, do not treat that result as a reliable representation of the site.
Privacy checks before uploading
Your yard photo may contain more information than the landscape itself.
Before uploading, look for:
-
People, especially children.
-
House numbers, street signs, and mailbox labels.
-
Vehicle license plates.
-
Documents, delivery labels, or screens visible through windows.
-
Security cameras, alarm details, keys, or access codes.
-
Neighboring people or private property that is not necessary to the image.
-
Location information embedded in the file.
AILandscape designs are private by default, but uploaded content and instructions may be sent to storage, infrastructure, security, and third-party AI providers as needed to operate the service. The service does not guarantee that EXIF or other embedded metadata is stripped, provider model-training terms have not been fully verified, and no fixed asset-retention or deletion deadline is promised.
If those limitations are unacceptable for a particular image, do not upload it. Consider taking a new photo without sensitive details or using your device’s privacy controls to remove location metadata before uploading. Read the current privacy policy for the complete disclosure.
You must also have the rights and permissions needed to upload the image. Avoid using a client’s, tenant’s, neighbor’s, listing agent’s, or photographer’s image without authorization.
Gallery consent is separate
Uploading a photo does not automatically place it in the public Gallery. Designs are private by default.
The generator includes a separate, initially unchecked Gallery option. Selecting it submits the original photo and generated result for possible public before-and-after display. An administrator must approve the submission before it can appear publicly, and approval is not guaranteed.
Before opting in, check the original photo again for house numbers, people, license plates, neighboring privacy, and other identifying details. Gallery consent is not the same as general account use.
Upload requirements
The current generator accepts:
-
One image per upload.
-
JPG, PNG, or WebP format.
-
A maximum file size of 8 MB.
A visitor can select a photo and configure the design before signing in, but generation requires an authenticated account. The generator preserves the pending input through the sign-in handoff when possible.
Do not convert a poor image repeatedly merely to match a supported format. Recompression can add artifacts. When practical, start with the original clear photo, crop only what is unnecessary, remove sensitive information, and export a copy within the size limit.
Evaluate the generated result against the photo
After generation, use the source image as a checklist rather than judging only the visual appeal.
Ask:
-
Did the house, door, fence, path, patio, and mature trees remain recognizable?
-
Did the image change the width or slope of the space?
-
Did it block an entrance, gate, utility, or service route?
-
Did it invent a wall, step, pool, structure, or level change?
-
Are plants merely visual placeholders, or have I mistakenly assumed they are identified species?
-
Which parts communicate a useful design direction?
-
Which parts must be ignored or verified?
Repeated generations may produce different compositions even from the same photo. Compare broad ideas, not small visual details. The practical guide to AI garden visualization explains how to carry a concept into a safer review process.
You can also inspect before-and-after landscape examples to see how the source photograph remains the reference point for judging an AI-created direction.
Frequently asked questions
What is the best photo angle for AI landscape design?
Use the angle that clearly shows the target area and its relationship to the most important fixed features. A level, ordinary-width view from a corner, doorway, gate, or property edge is often more informative than an extreme wide-angle shot.
Should I use a wide-angle lens?
Use it only when space is too tight for a normal viewpoint. Check for stretched foreground objects and curved or leaning edges. If the wide-angle image makes the space look substantially larger, try the standard lens from farther back or from a different corner.
Can I upload more than one yard photo?
The current AILandscape generator accepts one image at a time. You can take several reference photos, then run separate explorations from the viewpoints that support different decisions.
Do I need measurements in the photo?
No measurements are required to generate a visual concept. However, the generated image does not create reliable measurements. Record real dimensions separately and use verified site information before planning purchases or construction.
Does a better photo make the output accurate?
A clearer photo can improve visible context and make the result easier to compare with the property. It does not guarantee accurate geometry, plant identification, drainage, structure, code compliance, or construction feasibility.
Should I photograph an empty or cleaned-up yard?
Remove temporary clutter that blocks the space, but keep permanent constraints and anything the design must accommodate. A clean but misleading photo is less useful than an honest photo showing the real access, equipment, trees, and structures.
Final pre-upload checklist
Before you create a landscape concept from your yard photo, confirm:
-
The design question is clear.
-
The target area is large enough in the frame.
-
The camera is level and the image is sharp.
-
Fixed features and access routes are visible.
-
Strong shadow and lens distortion are limited.
-
Temporary clutter is removed without hiding real constraints.
-
Sensitive details and unnecessary people are not visible.
-
Location metadata has been considered.
-
The file is one JPG, PNG, or WebP image no larger than 8 MB.
-
You have permission to upload it.
-
You will treat the result as a visual direction requiring independent verification.
The best input photo does not need to be beautiful. It needs to be readable, honest about the space, and aligned with the decision you want to explore.